

Pumpkin season is the perfect time to roll science and fall into one big, happy unit of learning fun! Between field trips to the patch, pumpkins on the classroom windowsill, and pumpkin-spice everything, your students already have pumpkins on the brain—so use it to your advantage! In this post, I’m sharing a great menu of pumpkin science experiments and activities to get you through the beginning of fall to Halloween (and beyond). Just plug them right into your lesson plans. Everything here is designed for hands-on learning and lots of “ah-ha” moments for kids from K to 5th grade.
If you aren’t convinced to keep reading yet, just think about this… pumpkins equal instant classroom management. The minute you put a pumpkin on the table, you’ll have 100% engagement.
Pumpkin Science Experiments Your Students Will LOVE!
.
.
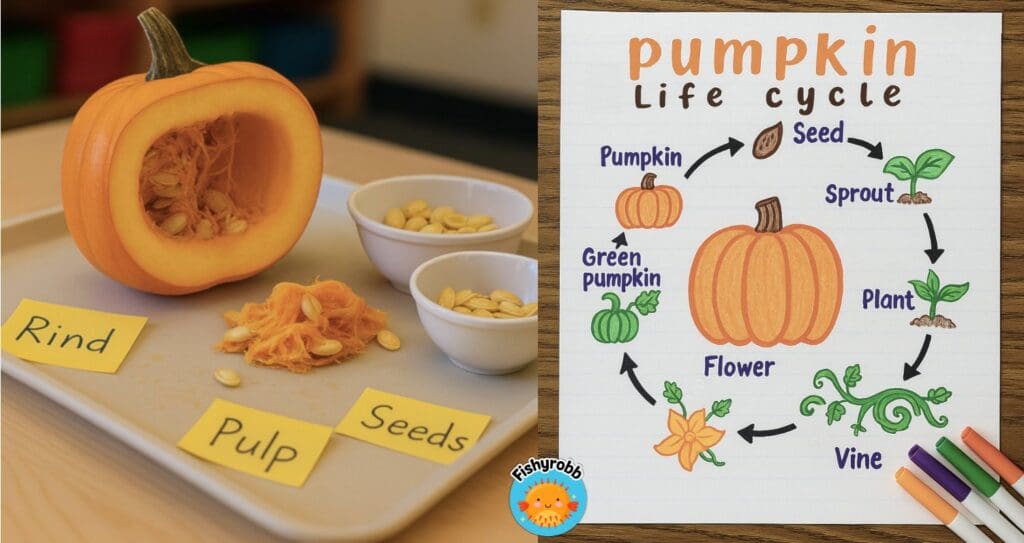
Pumpkin Dissection & Parts of the Pumpkin
Before you dive into some fun science experiments, let your students get to know the pumpkin as a living thing. A simple pumpkin investigation is the perfect way to do this.
Best for: K–3rd
What to do:
- Show a whole pumpkin. Ask: “What parts can you name?” Point out the stem, rind/skin, pulp, pumpkin seeds, and blossom end.
- Remove the top of the pumpkin like a lid. Pass around a bowl of the pulp for a sensory experience (ask students to describe the fibrous strands – how they look, feel, and smell).
- Students sketch and label the different parts of a pumpkin.
.
Add science concepts:
- Why are seeds slimy? (for protection and moisture)
- Why is the stem woody? (for support)
- Discuss the life cycle of a pumpkin and create an anchor chart together (seed → sprout → vine → flower → green pumpkin (unripe) → orange pumpkin (ripe) → new seeds).
.

Here’s a simple one-page Pumpkin Observation Sheet that guides students as they study their own little pumpkin – from drawing and describing, to predicting and measuring.
Grab this worksheet from the Free Resource Library!
.
Counting, Sorting, and Sprouting Seeds
Best for: K–2nd
Counting: After your dissection, challenge students to estimate and the number of pumpkin seeds. Count them to see who had the best estimate (group by tens to practice skip counting). This lets you tie in a little bit of math.
Sorting: Sort seeds by size or color
Extension: Place a few seeds on damp paper towels in plastic sandwich baggies. Set one on a windowsill and the other elsewhere in the room. Observe the seeds over time to compare growth in sun vs. shade. Record daily in science notebooks. This interactive science activity is a great way to link to the needs of plants (light, water, warmth).
.

.
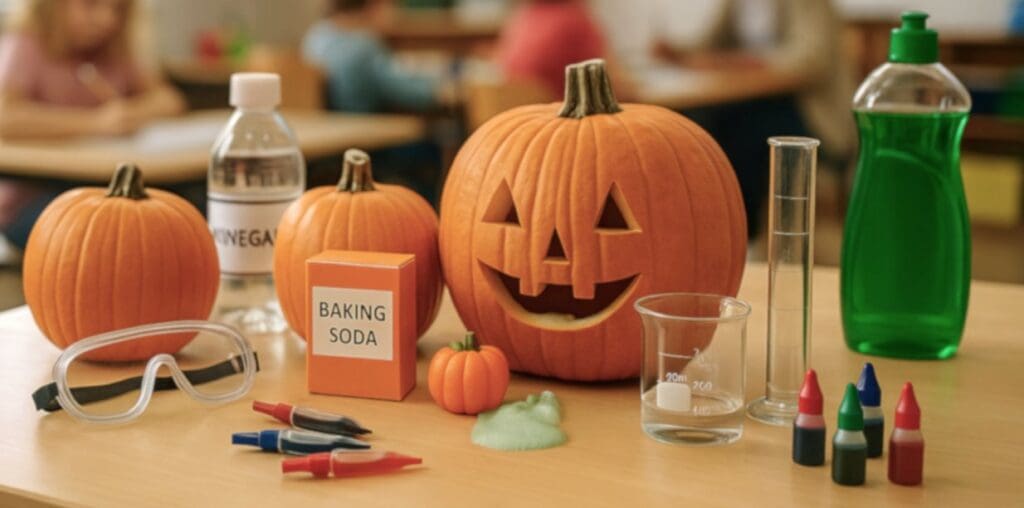
Pumpkin Volcano
This is the pumpkin experiment everyone asks for. It’s simple chemical reaction between baking soda (a base) and vinegar, producing carbon dioxide bubbles – inside a small pumpkin to make it fun! Add dish soap for extra foam and warm water to get the fizz going. Even older kids love this one!
Best for: K-5th
You’ll need (per group):
- One small pumpkin with the top of the pumpkin cut off
- 2–3 Tbsp baking soda
- 1/2 cup vinegar
- 1–2 tsp dish soap
- A little warm water
- Drops of food coloring (any color—let them choose)
- Tray + spoons
.
Directions:
- Scoop out a shallow well inside the pumpkin.
- Add baking soda to the well. Stir in dish soap and a splash of warm water. Drop in color—kids love choosing the “lava.”
- Count down 3-2-1 and pour in the vinegar. Stand back! It will bubble over like a foamy volcano.
- Repeat with lemon juice and compare the strength of the reactions.
.
What’s the science?
Acid + base reaction to form carbon dioxide gas + water + salt (the classic chemical reaction students will see again in older grades). The dish soap traps the gas into bubbles, creating foam. Warm water can speed the reaction because heat increases the amount of kinetic energy.
.
Vinegar vs. Lemon Juice Mini Investigation
Keep the pumpkin out and try this quick and fun experiment to compare acidity. This add-on makes your pumpkin volcano feel like a true experiment rather than a one-and-done demo.
Question: Which liquid makes a bigger eruption – vinegar or lemon juice?
Prediction: Students circle their guess.
Test: Same amount of baking soda and dish soap; first add vinegar, then clean up and repeat with lemon juice instead.
Observe: Mark the foam height on a ruler taped to the pumpkin.
.
Differentiation by grade level:
- Kindergarten: Focus on sensory experience and language – loud/quiet, fast/slow, bubbles/foam.
- 1st grade: Test and draw what happened.
- 2nd grade: Test and record results on a simple graph.
- 3rd grade and up: Practice writing a hypothesis together. Change one variable at a time (amount of baking soda, warm water vs. no water) to see how the results change. Discuss why only 1 variable should be changed at one time.
.
Classroom management tip: Pre-measure the vinegar and lemon juice into labeled squeeze bottles and have a helper control the pours.
.

.
Pumpkin Toothpaste
If you’ve ever heard of “elephant toothpaste,” here’s a pumpkin-themed spin on that simple chemistry experiment. It’s very similar to the volcano, so you may want to choose one or the other.
Using 3% hydrogen peroxide and yeast as the catalyst, bubbly foam pours out of a pumpkin’s mouth like some messy toothpaste!
Best for: 2nd-5th
Materials:
- Hollowed out pumpkin (face optional)
- 1/2 cup 3% hydrogen peroxide (drugstore strength)
- 1 Tbsp liquid dish soap
- Liquid Food coloring
- 1 packet active dry yeast + 3 Tbsp very warm water (not hot)
- Tray + goggles
.
Procedure:
- Inside the pumpkin, mix peroxide and soap.
- Add drops of food color to the inside walls.
- In a cup, stir yeast into warm water (this activates it).
- Countdown 3-2-1 and pour yeast into the pumpkin—thick foam pours out.
.
Science: The yeast speeds the decomposition of hydrogen peroxide into oxygen + water. The soap traps the oxygen and creates foam. It’s an exothermic reaction – let students feel the warmth on the outside of the pumpkin (no touching the foam). This is a great demonstration for older students, but even K–3 can safely watch, predict, and describe.
Compare and Connect: This is different from the vinegar/baking soda chemical reaction (which produced carbon dioxide), but both use gas to make bubbles. If you do both experiments, tie back to gas production as evidence of a chemical change.
.
.
Float or Sink? Pumpkin Investigation
This one is a great “gotcha” activity because kids and adults alike are surprised to discover that real pumpkins, even big ones, often float.
Best for: K-5th
Set-up: Large tub of warm water, several pumpkins of different sizes and a mini gourd.
Ask/Predict: Will it float or sink? Why?
Discuss: The rind is filled with tiny air spaces. That can make the pumpkin’s density less than water—so it floats. Cut one open and compare a hollowed out pumpkin vs. a solid mini gourd.
Extension for grades 3 and up: Measure how many cups of water a floating pumpkin displaces. The concepts of buoyancy, density, and volume are often part of 4th and 5th grade science curriculum.
.
.
.
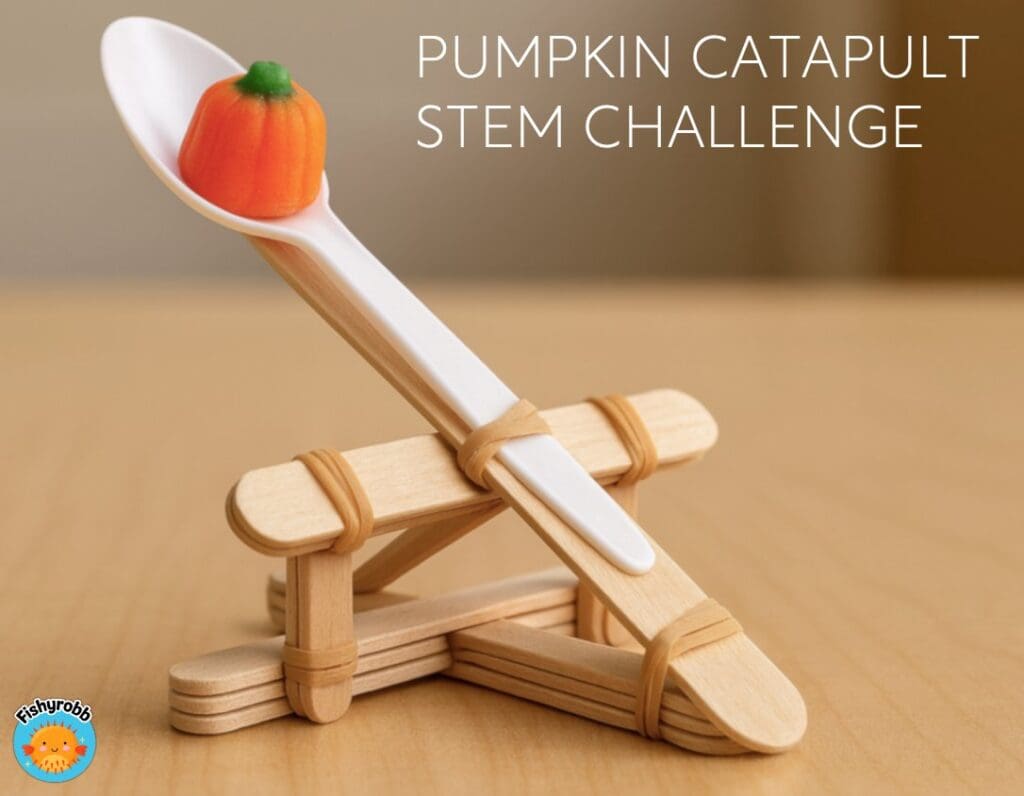
Pumpkin Catapult STEM Challenge
This is a low-prep STEM activity that every age loves, and it sneaks in measurement, variables, and the engineering design process.
Best for: 2nd-5th
Materials (per team):
- 7–10 craft sticks
- 5–7 rubber bands
- 1 plastic spoon
- Tape, ruler, target mat (masking-tape bullseye on the floor)
- Bowl of candy pumpkins (the kind similar to candy corn but pumpkin shaped)
.
Challenge: Build a catapult that launches a candy pumpkin the farthest (or most accurately) using only these materials.
Process (engineering design):
- Imagine: Sketch a design
- Build: Bind sticks with rubber bands; attach the spoon as the lever arm.
- Test: Launch 3 times; measure distance each time.
- Improve: Change one variable (arm length, number of stacked sticks, fulcrum position).
- Share: Record data; draw conclusions.
.
Differentiate:
- 2nd grade: Use floor tiles or rulers to measure; best of three trials.
- 3rd grade: Measure with tape measure or yard sticks, graph results.
- Older students: Angle optimization, changing variables, potential vs. kinetic energy, find the average distance of three trials.
.
Safety: Goggles on; establish a launch line and a “no hands past the line” rule. Assign one “retriever” per team.
.
Pumpkin Bridge STEM Challenge
If your class loves STEM activities, here’s another simple one for younger kids that you can work in without a lot of materials required.
Best for: 1st-3rd
Materials:
- craft sticks
- tape
- a few mini pumpkins
.
Challenge: Build a bridge that can hold the weight of two mini pumpkins over an 8 inch (20 cm) gap without breaking.
.

.
Pumpkin Decomposition Investigation
This is a fun way to work in some “gross science” to your pumpkin activities. It’s also a good accompaniment to the book Pumpkin Jack if you want to work in a read-aloud here.
Best for: 1st-5th
Procedure:
- Prepare 3 small pumpkins: uncut, cut (no treatment), and cut brushed with lemon juice or vinegar.
- Place each pumpkin in its own container (empty jumbo snack canisters work well) or outside
- Ask students to predict which one will turn moldy and decompose the fastest.
- Observe daily, record in notebooks, and discuss variables: exposure to air, acidity, moisture, temperature
.
Dancing Pumpkins
This is a really quick and non-messy demonstration.
Best for: K-3rd
Materials: Clear cups, club soda or sparkling water, a few pumpkin candies
Procedure:
- Fill a cup with the soda.
- Drop the candies in and watch them “dance” around.
.
The bubbles of carbon dioxide stick to the ridges, lift them up, and then they fall when bubbles pop – a visual of buoyancy and how gas rises because it is less dense than water.
.

.
Pumpkin Slime
Slime is a real sensory experience and so much fun! You don’t actually need a pumpkin for this one. Just add a few drops of orange food coloring and a little pumpkin pie spice for smell.
Best for: K-2nd
Classroom-safe pumpkin slime recipe (borax-free):
- 1/2 cup white washable glue
- 1/2 tsp baking soda
- 3 cups foam shaving cream (unscented if you can find it)
- 1 tbsp saline contact solution
- Optional: Orange food coloring coloring + a pinch of pumpkin pie spice
.
Procedure:
- Put shaving cream in a small bowl.
- Stir in food coloring and spice.
- Add glue and mix well.
- Stir in baking soda.
- Slowly add saline while kneading until it pulls away from the bowl.
.
The more you knead the slime, the smoother and less sticky it will get.
Ask: How does adding more saline change the texture? Let students write “recipes” in their notebooks and test tweaks to it.
Clean-up tip: Use disposable plastic bowls. Keep vinegar on hand. It helps remove slime residue on desks.
.
.
Cross-Curricular Connections for These Pumpkin Science Experiments
Now that you’ve had some amazing pumpkin science fun with your students, you can tie it into the rest of your curriculum by adding these to your lesson plans:
- Writing: “If my pumpkin could talk…” narrative; sequential writing to explain the pumpkin life cycle; lab reports.
- Math: Counting and estimating pumpkin seeds, measuring foam height, averaging catapult trials, graphing sink/float predictions vs. outcomes.
- SEL: Turn-taking at stations, roles (materials manager, recorder, tester, reporter), sharing materials
.
.
Pumpkin-Palooza Day
If you want to turn these hands-on activities into a themed science day, set them up in stations with a rotation schedule. You’ll probably want to recruit at least a couple of parent-volunteers to help you out.
Station 1 – Pumpkin Exploration: Label the parts of the pumpkin, sort seeds, create a pumpkin life cycle foldable.
Station 2 – Volcano Central: Run the vinegar vs. lemon juice comparison; chart foam height.
Station 3 – Buoyancy Lab: Test various sizes of pumpkins, see how well they float compared to gourds.
Station 4 – Slime Lab: Mix the pumpkin slime recipe; write your “formula” and test stretch.
Station 5 – Catapult Range: Build and launch candy pumpkins; measure and graph.
Station 6 – Decomposition Watch: Set up the jars, make predictions, and have students set up an “observation journal” in their science notebooks.
.
Rotate every 15 to 20 minutes. Keep a trash can at each station for easy clean up and display a timer on the board to keep things moving on a schedule.
At the end of the day, wind everyone back down with a few read-alouds! Here are some of my favorites: 13 Best Halloween Read Aloud for 1st and 2nd Grade
.
A Note on Age Ranges and Differentiation
- Kindergarten students: Heavily guided, lots of modeling and language – focus on descriptive words and safe participation.
- 1st grade science: Add prediction and simple recording; keep numbers friendly.
- 2nd grade science: Simple measurements and comparison charts, focus on “fair testing” (no cheating)
- 3rd grade: Introduce variables, multi-step procedures, and graphing.
- Older students: Advanced math and science concepts and vocab (angles, velocity, density, buoyancy, deeper chemical change explanations)
.
Vocabulary Quick Reference
Here are some of the vocabulary words you may want to pay special attention to during your activities:
- Life cycle (seed, sprout, vine, flower, fruit, seed)
- Parts (stem, rind/skin, pulp, fibrous strands, pumpkin seeds, blossom end)
- Reaction (acid, base, carbon dioxide, exothermic)
- Properties (float/sink, density, stretchy, foamy)
- Engineering (design, test, improve, variable, measure)
.
Post a word wall; have students add sticky notes with examples from their data or drawings.
.
.
Autumn is the perfect time to turn your classroom into a mini lab. You don’t need fancy kits or hours of prep—just a few small pumpkins from the grocery store, a box of baking soda, some vinegar, drops of food coloring, and the courage to let kids get a little messy in the name of curiosity.
So pick two or three fun pumpkin science experiments, add them to next week’s plans, and have FUN – because pumpkins make science feel like play and you’ll give your young scientists an experience they’ll talk about all year.
.
Hands-on Science Resources You Might Like:
.